Bedazzle
Beads are the perfect way to add a bit of sparkle to your hand knits. Incorporating beads is not difficult. Let's take a look at the various methods of working with beads.
Pre-Stringing
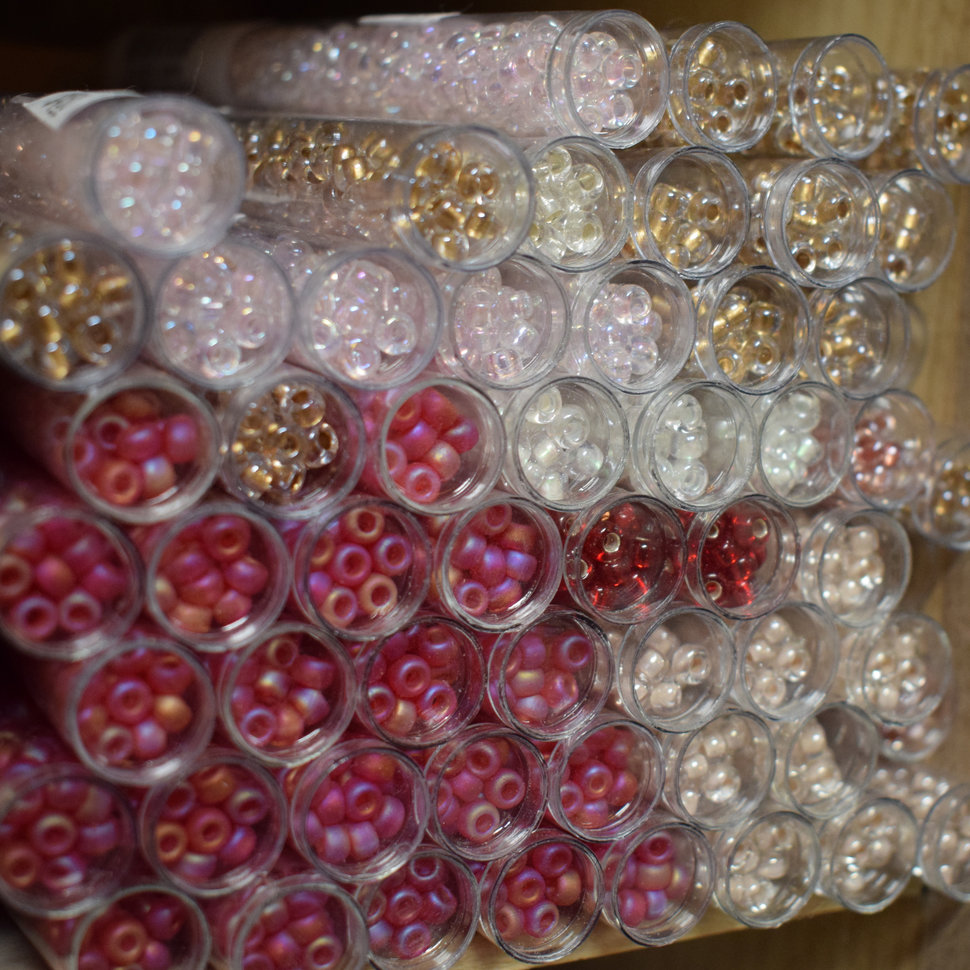
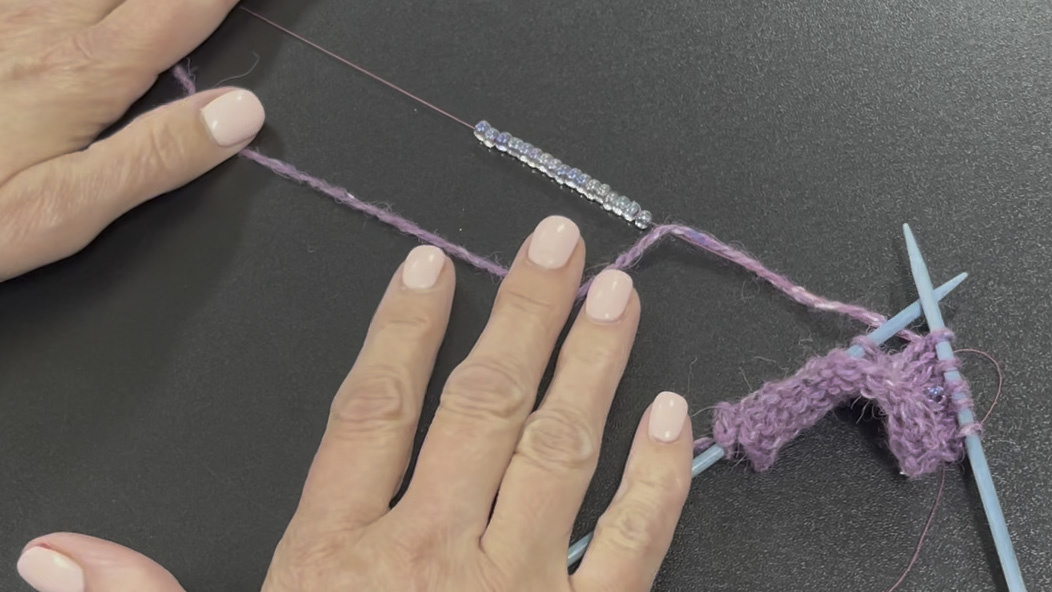
The most basic way to incorporate beads is by pre-stringing them onto your yarn. The beads must have a hole large enough for the yarn. Typically a size 6/0 bead is the smallest size you’ll want to work with, and it will fit on yarns as large as a light DK weight. With heavier yarns, you’ll need larger beads, but they can get heavy so that is something to consider.
A beading needle, such as the Clover Swift Bead make pre-stringing a snap.
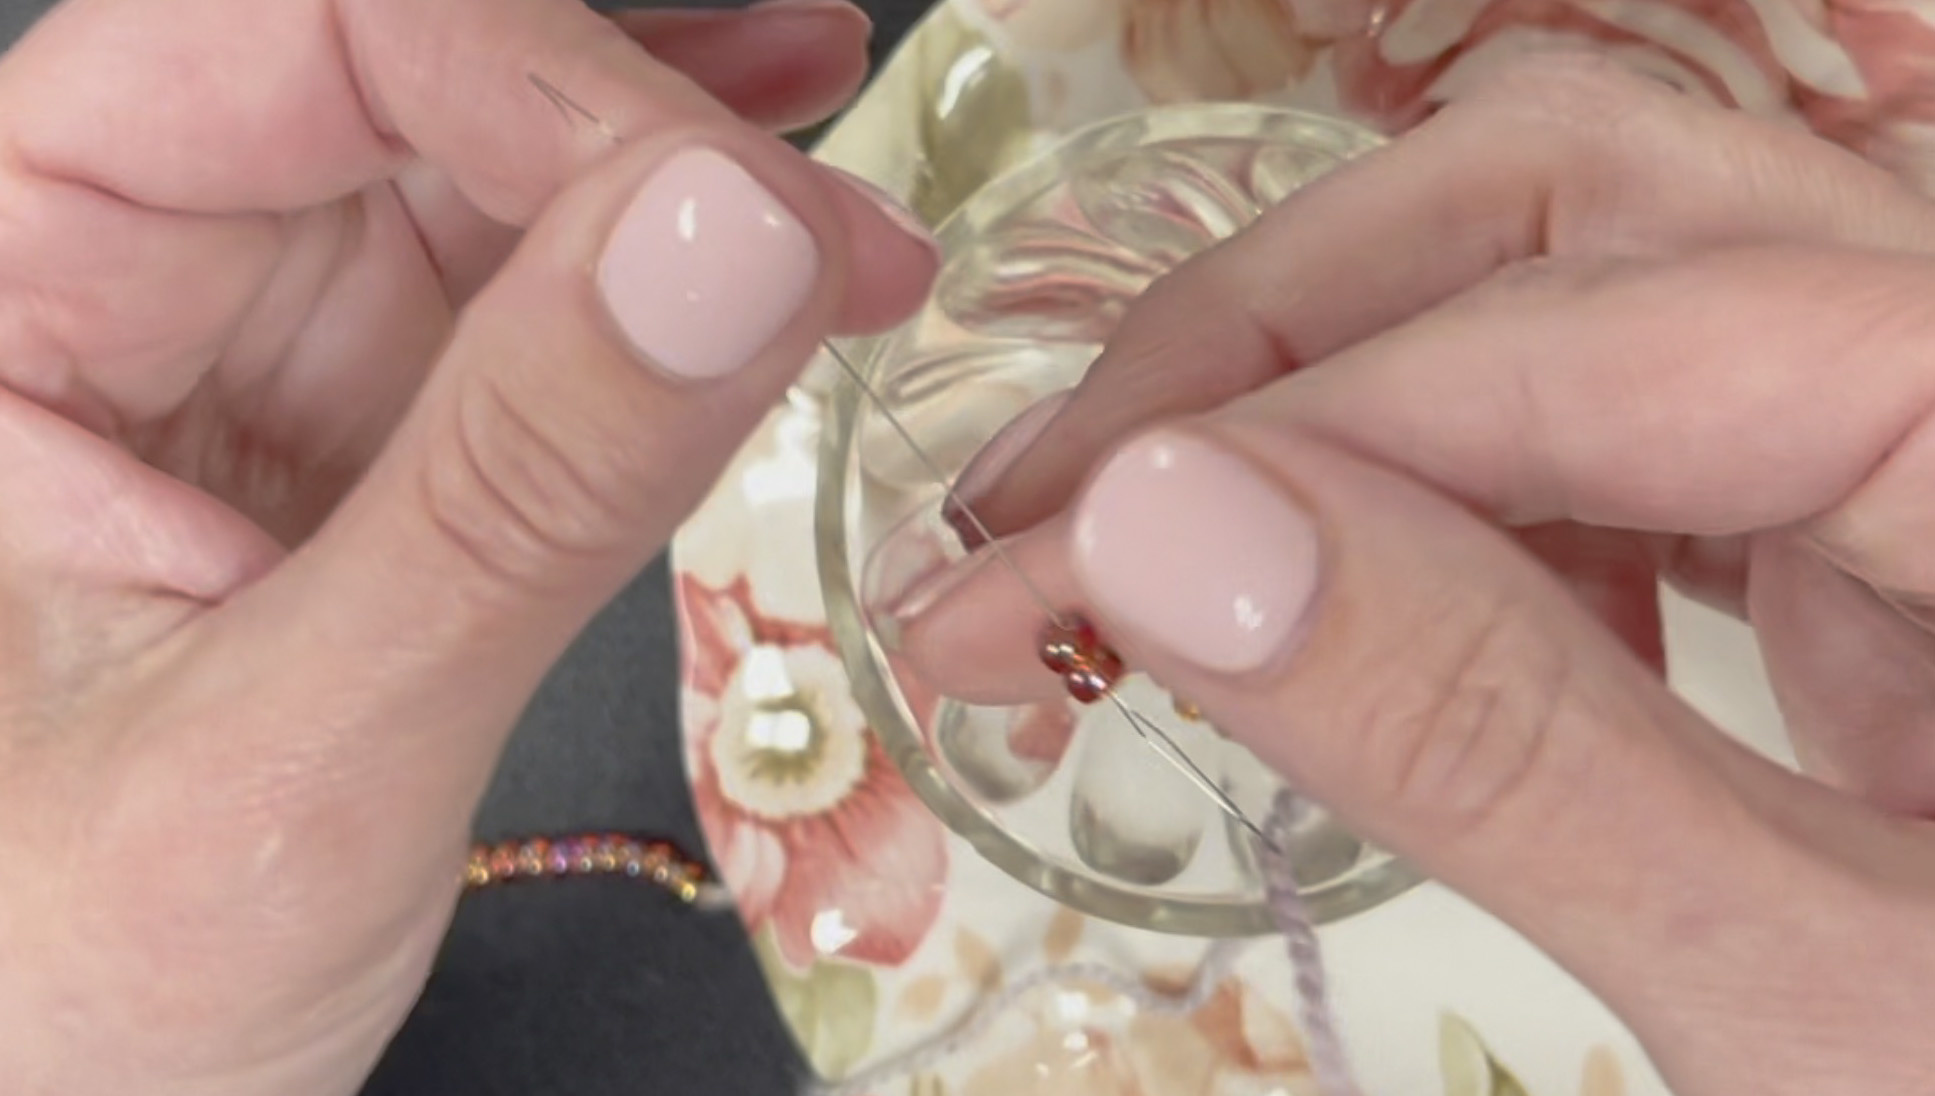
If you don’t have a beading needle on hand, you can thread a sewing needle with thread, then tie the thread around the yarn. Insert the needle through the beads onto the thread, then slide them onto your working yarn.
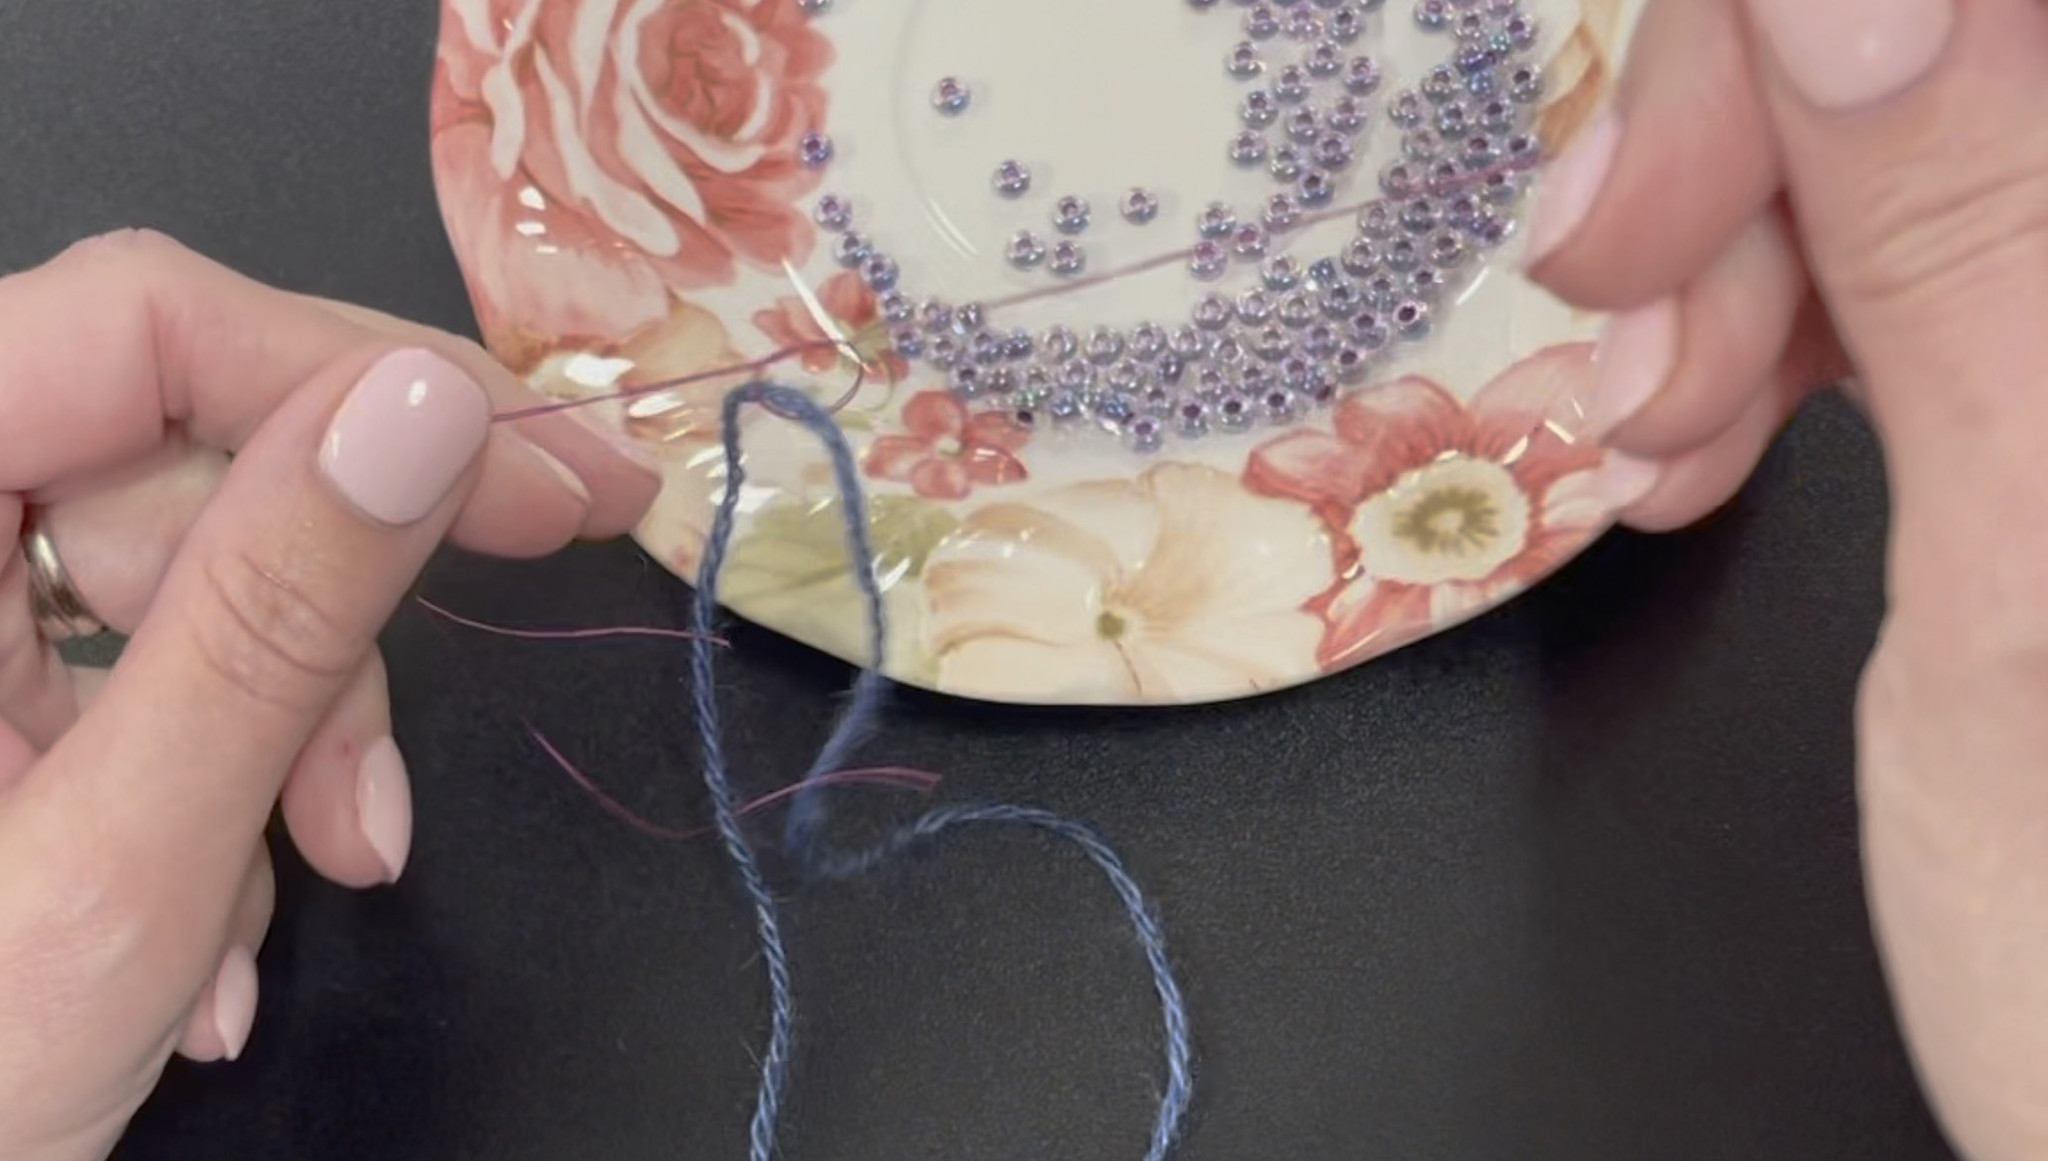
Typically you will string all the beads needed onto the yarn before beginning. It doesn't hurt to add a few extra, just in case! Extras can always be pulled off when finished. If you don’t string enough, you’ll have to add them to the end of your skein and that can be a mess.
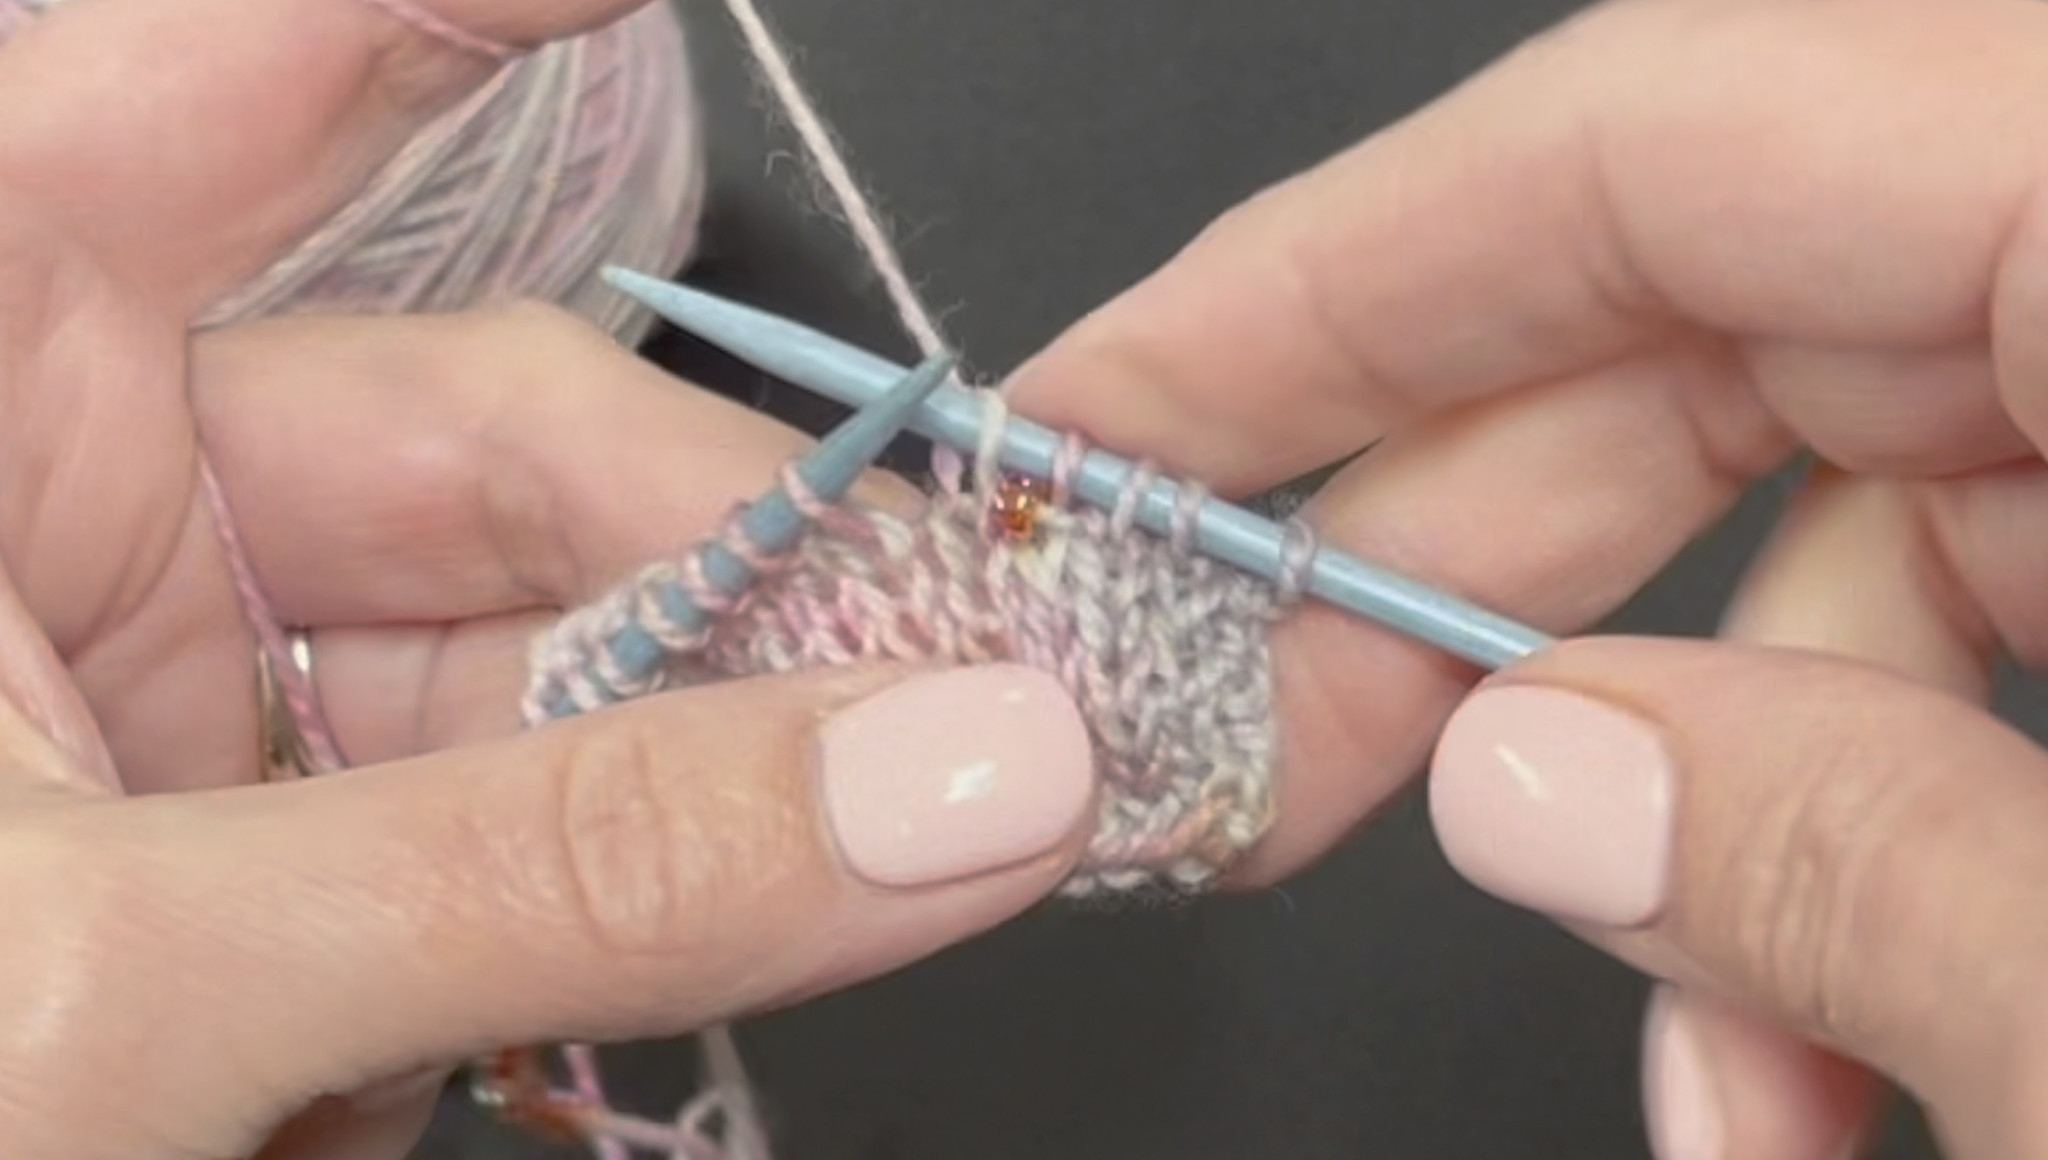
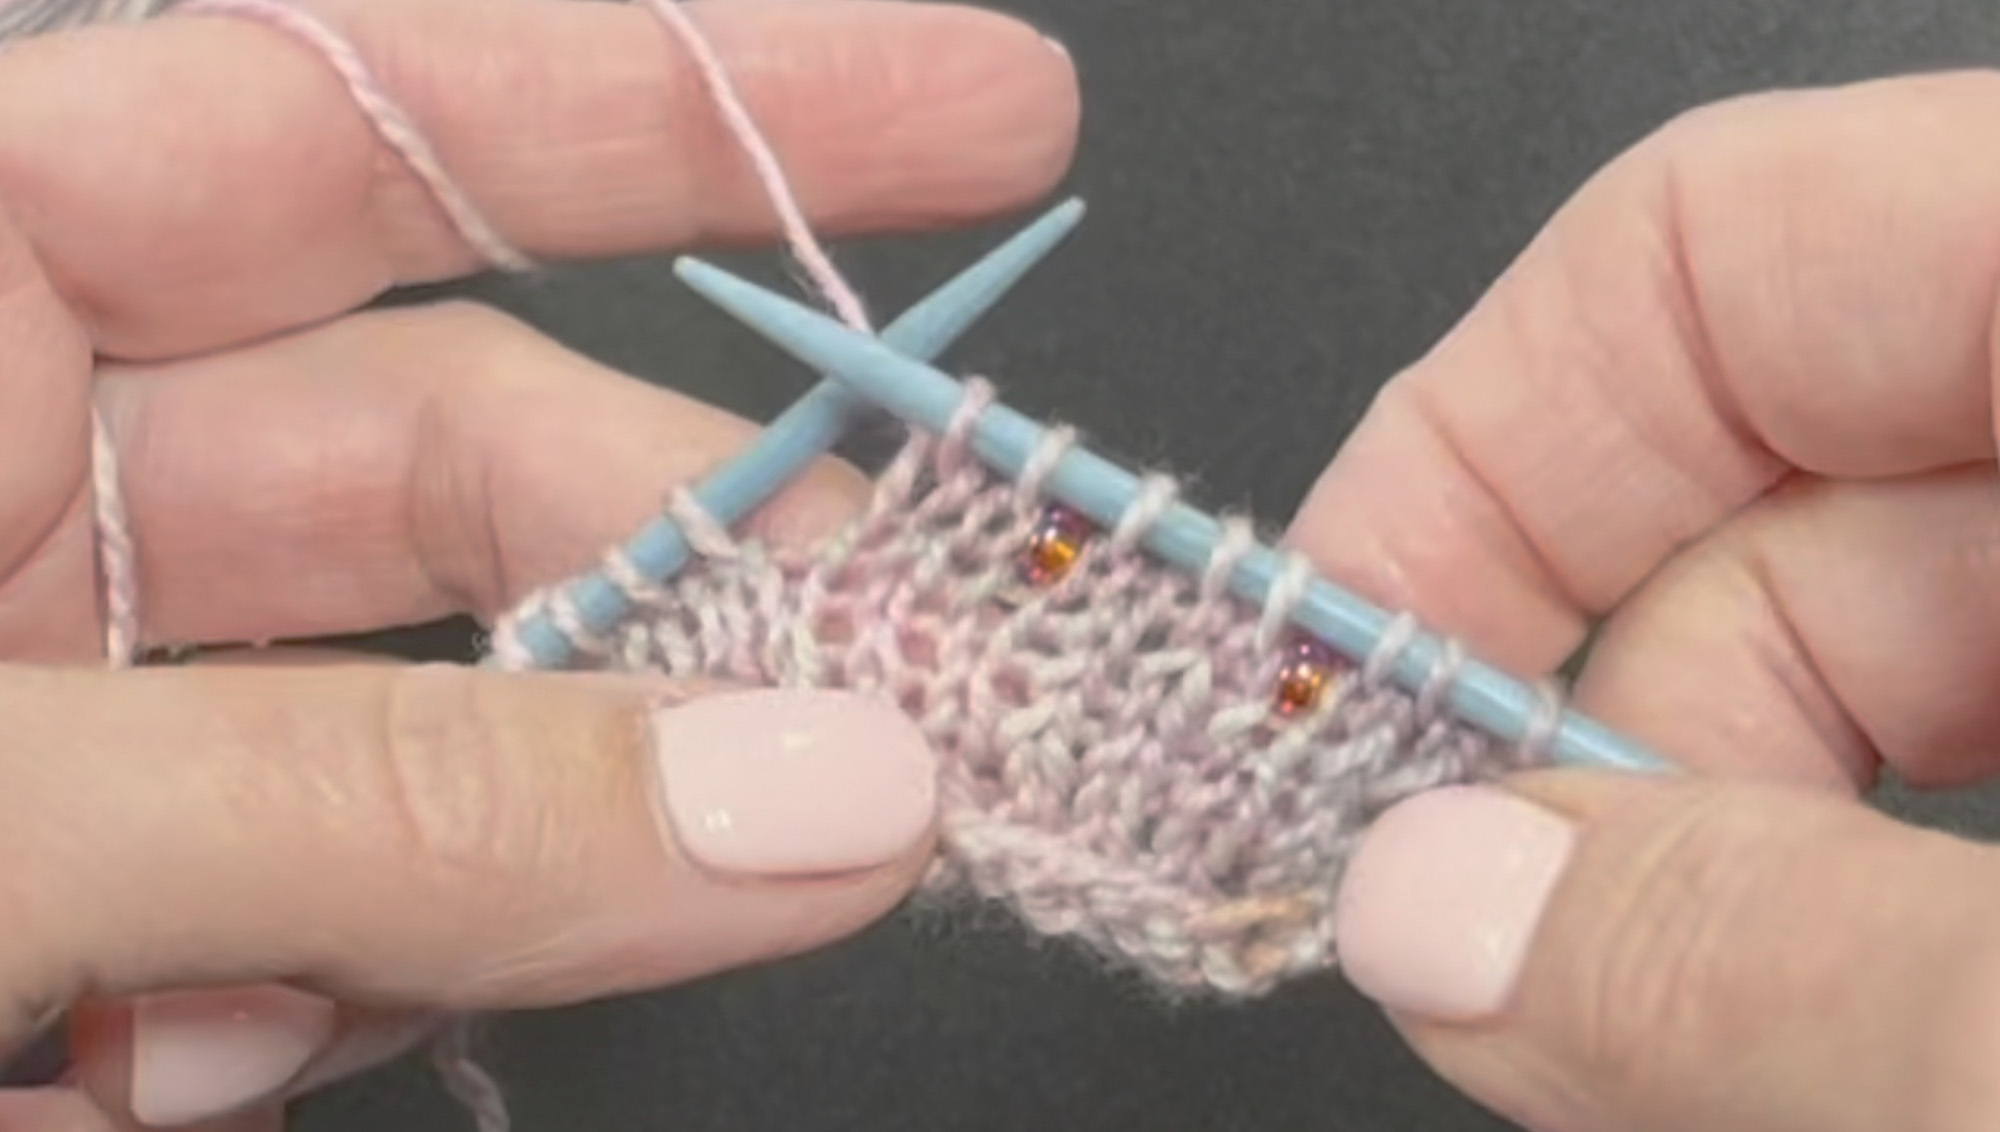
As you work, the beads are simply pushed back on the yarn until it is time to place a bead. To place a bead simply pull a bead into position, hold it in place, and continue working.
There are various positions where the bead can be placed.
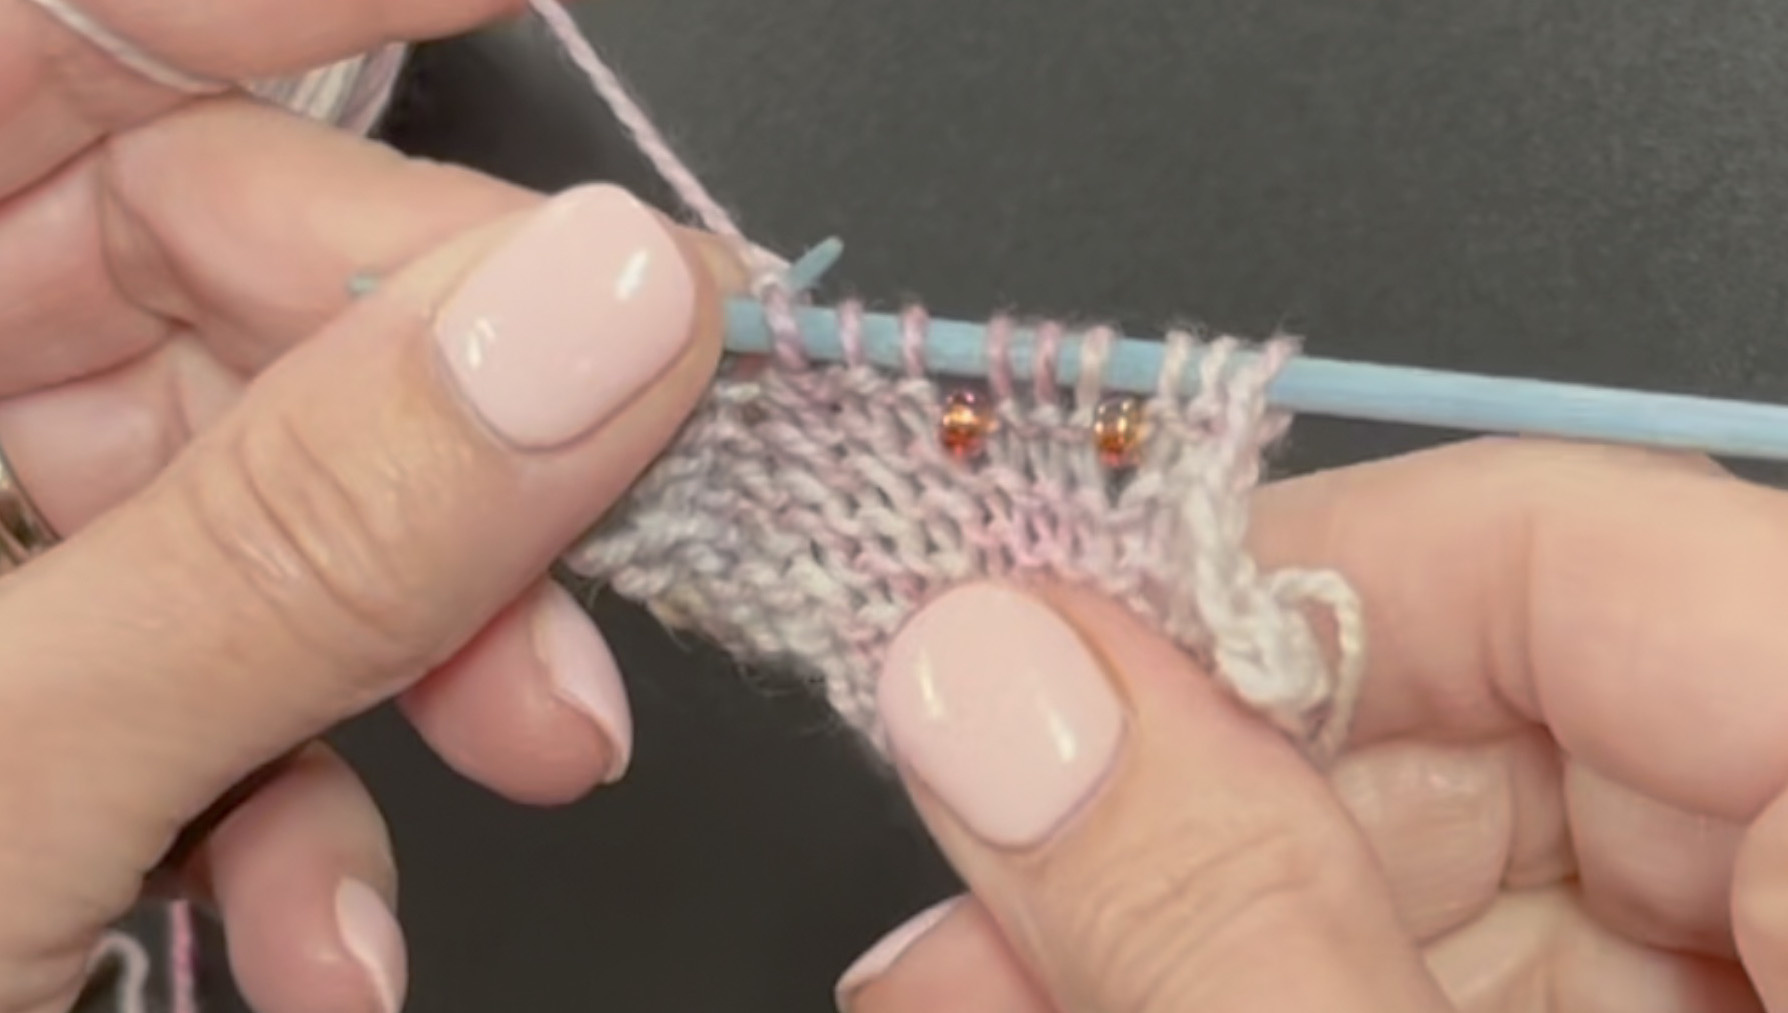
It can be placed between stitches, with the bead lying on a strand in between two stitches. This works best when placed on right side between two purl stitches, otherwise bead will stay to the wrong side.
The bead can be placed on a slipped stitch, with the bead falling on the strand of yarn on the front of the slipped stitch.
It can also be worked with stitch, with the bead pulled through stitch along with the yarn. Beads placed in this manner lie on the diagonal.
Adding a bead for crochet works in the same manner, with the bead placed in between stitches or at various points during the working of the stitch for various effects.
Stranded
The beads can also be stranded onto a strong thread in a color to match your yarn. You simply work the thread and yarn together up to point bead is to be placed. Separate thread from the yarn, bringing only the thread to the right side. Work the next stitch with only the strand of yarn, slide bead into place, then continue working with thread and yarn held together. This method is perfect for beads with holes too small to be strung onto the yarn.
Crochet Hook
You can also add beads as you work with a crochet hook. You’ll need a very, very tiny crochet hook that is small enough to fit through the hole of the bead. Finding a hook small enough is half the challenge. A size 8 or smaller steel is recommended, depending on your bead size.
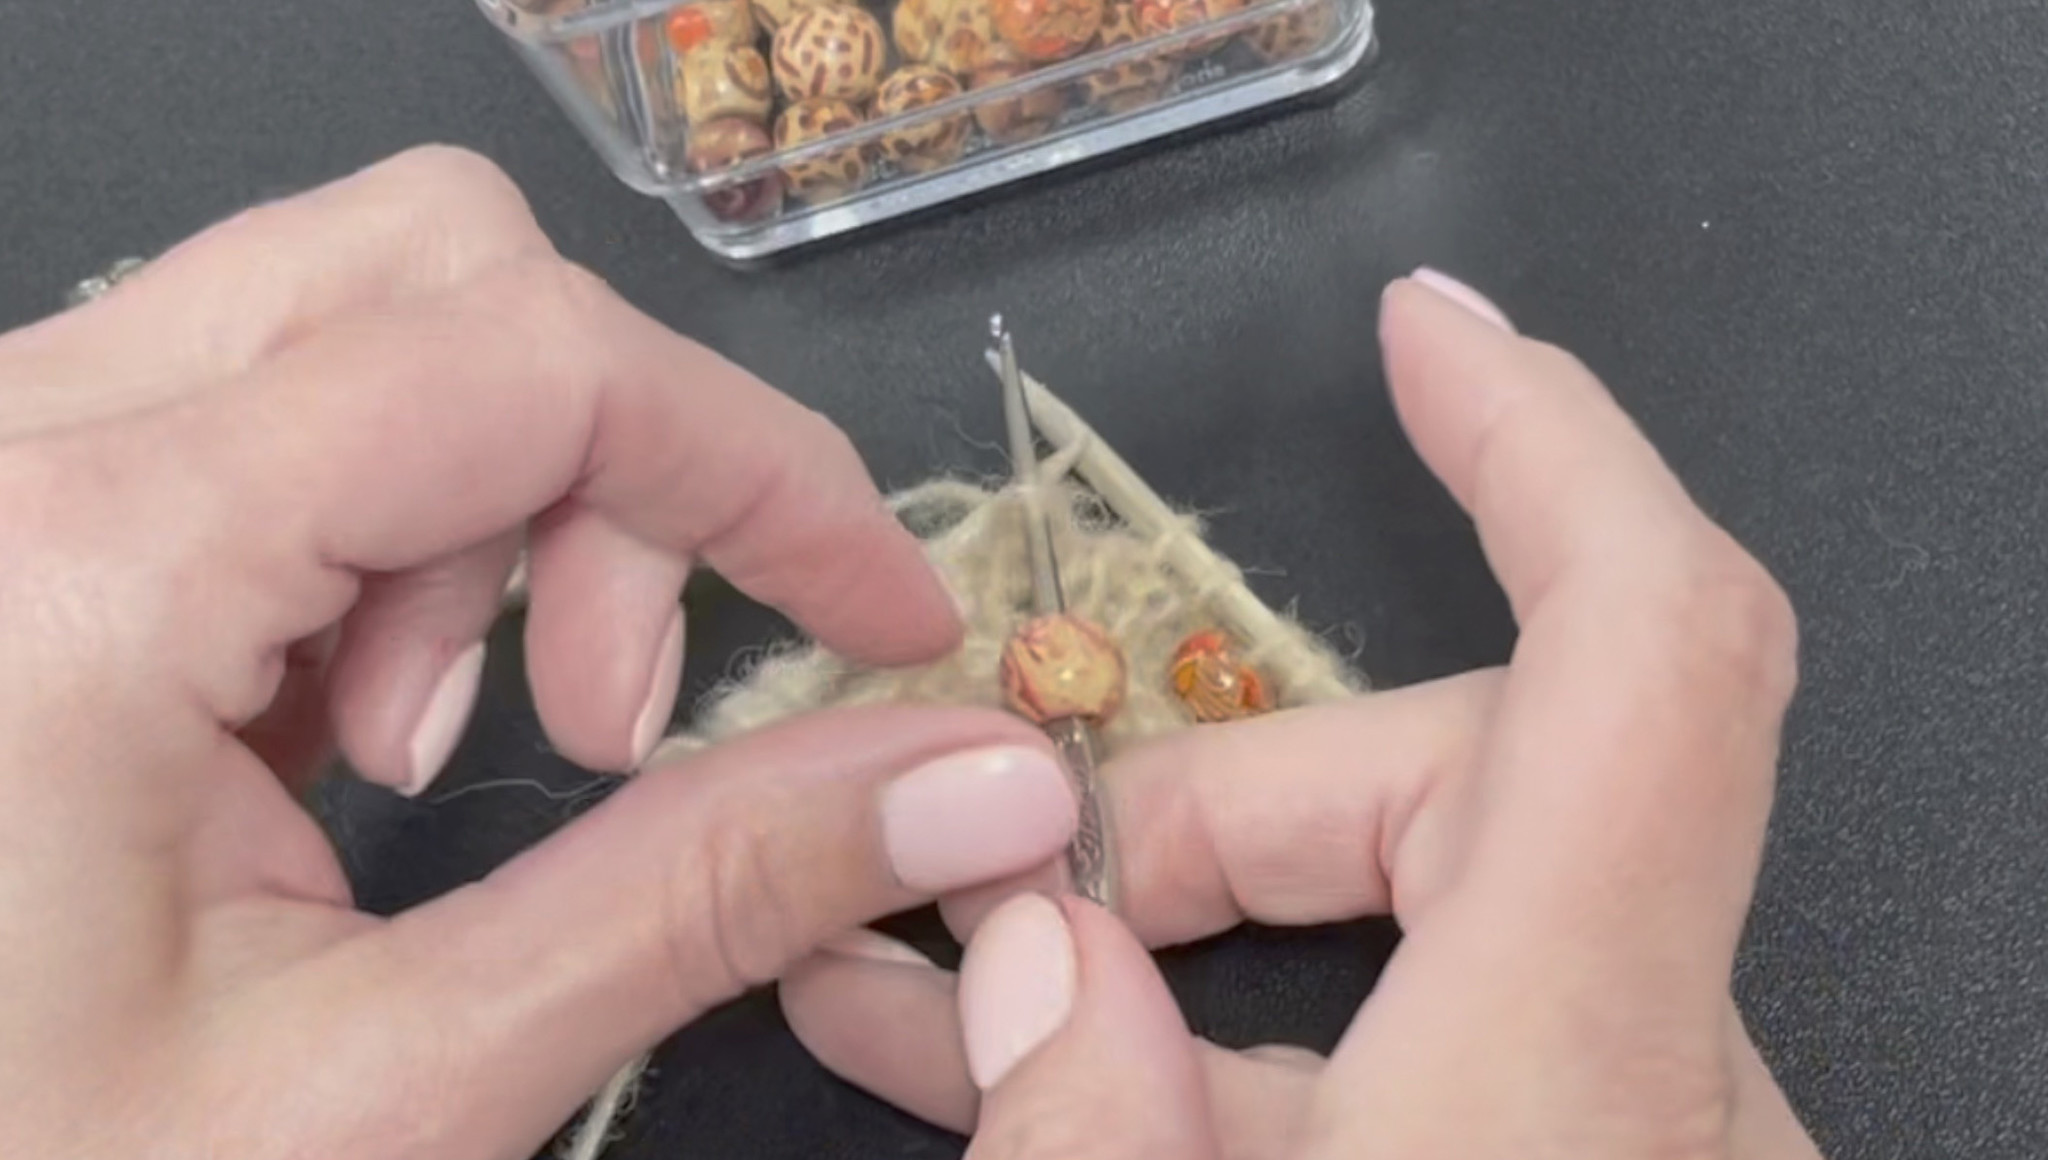
At the point the bead is to be placed, put bead onto the hook, place next stitch onto the hook, then push bead down onto stitch and return stitch to needle. It works best to slip this stitch rather than work it after bead is placed.
While the idea of not having to pre-string beads is quite appealing, fiddling with tiny beads and crochet hooks can be more of a pain. This method is not very practical for projects on the go.
Sewn Method
Beads can also be added afterwards by simply sewing them onto the work. One of the downsides of this method is...sewing individual beads! That’s not fun. You will need to use a very strong thread. Knitted fabric stretches, and rigid thread is prone to break.
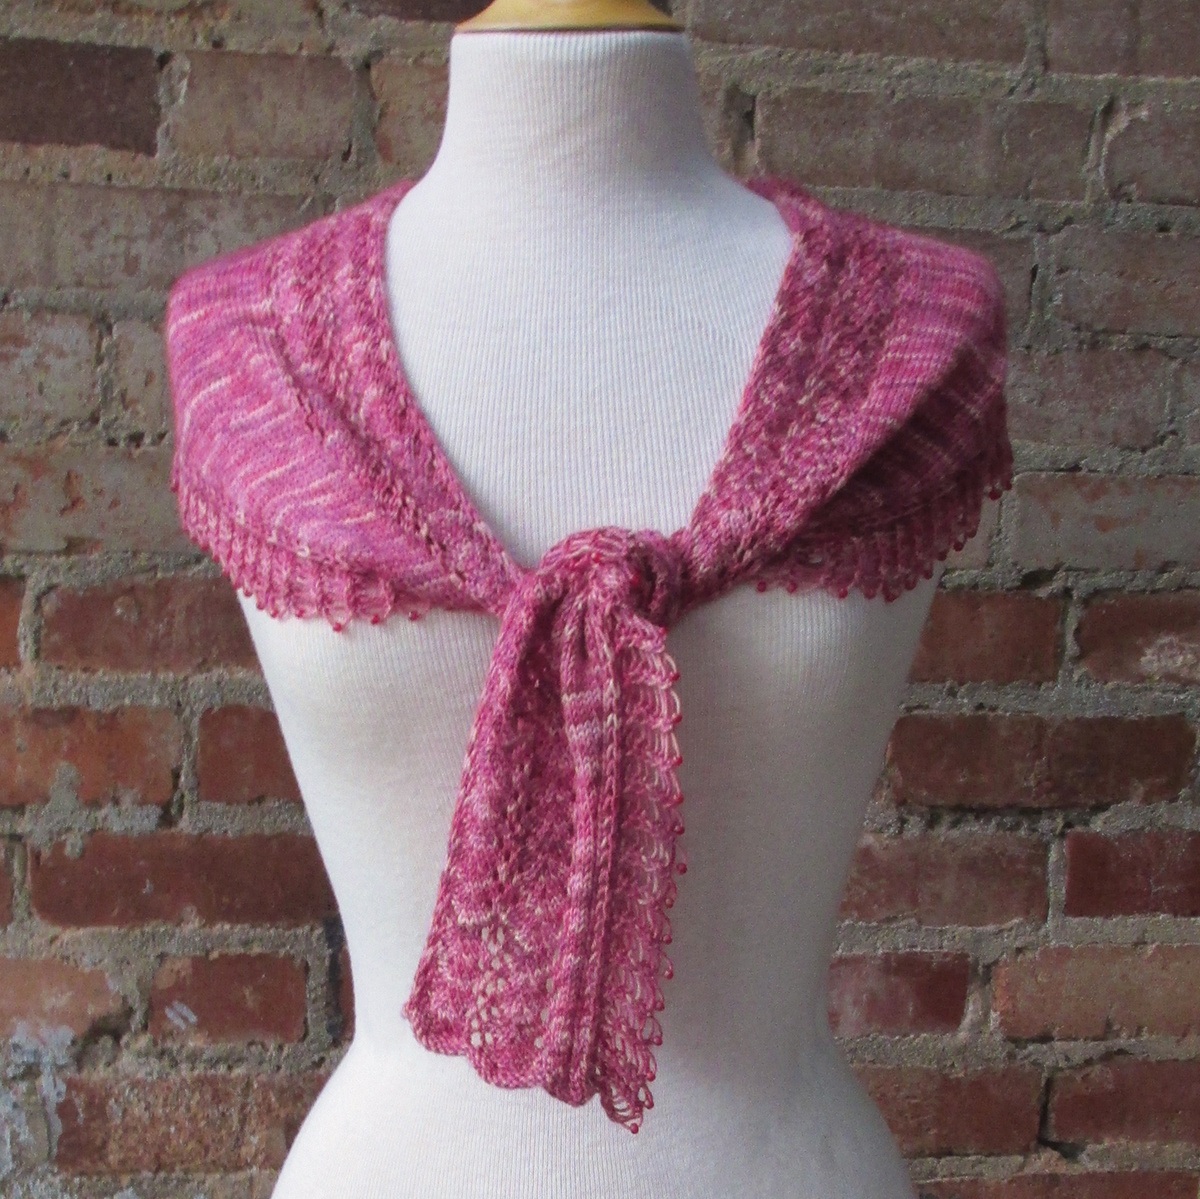
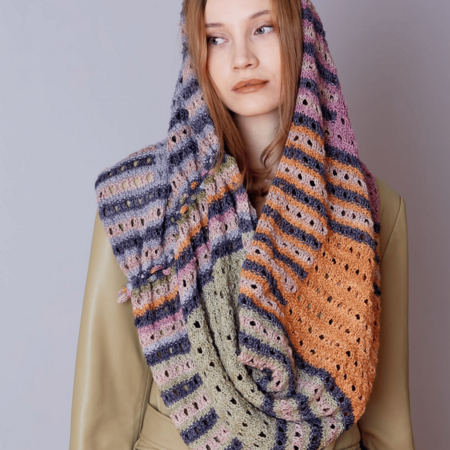
Lady Lucy, a Sealed with a Kiss design, is a lace scarf with a frilly beaded edging. The beads are strung, placed with cast on, and that’s it! The bead wrangling part of the process is over, and it makes for a very pretty edging.

Starlet Shawl, a half-star shape framed with beads, is another design from Sealed with a Kiss.
Both designs can be worked with one 100gm skein of fingering weight yarn, and are free downloads.
Ready to start beading? Watch this video tutorial, check out our selection of beads and get ready to bedazzle your next project!
Leave a comment
Recent articles
View all
Kaffe
Eco Vita